Tuesday, October 20, 2009

Sewing for Boys: part 3

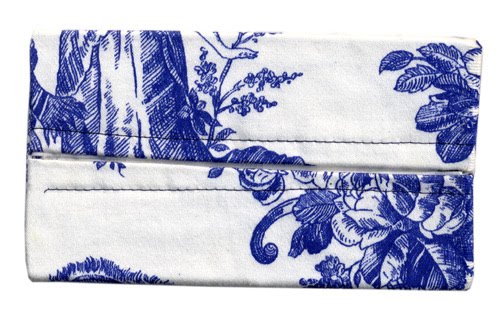
For the next three weeks we would be making a doorstop and then, over two weeks, a bag. Because both of these would potentially be subject to heavy usage I chose two fabrics from the August Fields home dec weight fabric range. This should give both projects some stability.

A homemade doorstop
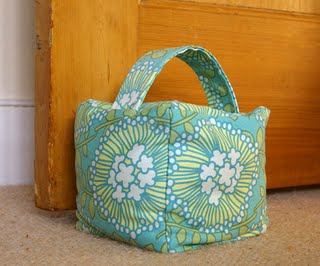
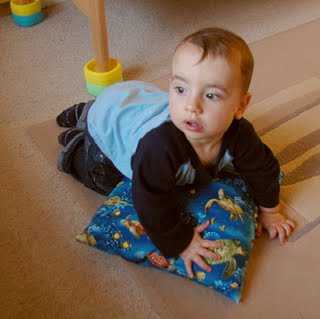
Filled with 2kg rice and beans, this should keep those pesky doors open.
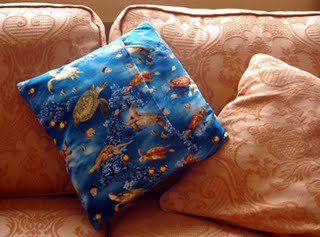
For the doorstop I chose the bright greeny blue of Coreopsis Spruce to contrast with our pale carpet and walls. The doorstop consisted of 6 x 6 inch squares with a strip for the handle. The handle was made by folding each edge into the middle and then pressing together. As Margaret at the shop pointed out to me, always have the iron on when making these sorts of projects or patchworking. I can't say that ironing is my favourite pastime. I am not flat so why should my clothes be but I can see the point here.
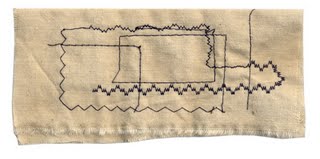
Then I sewed a seam up each side of the handle to secure it. It wasn't as close to the edge as I would of liked, but better then last weeks efforts. We then marked each of the squares with a dot inset 1cm from each corner. This would allow us to line up each of the squares. I was ultra cautious this time to make sure I was sewing right sides together.
It was then a case of sewing the squares together and gradually building up the shape of the cube. I need to work on my accuracy, but overall I was pleased with the result. A small hole was left in one side, so that the doorstop could be filled later and then the whole thing was turned inside out. I have now filled it with rice and pulses to weigh it down. I think all of us were surprised that we could construct a three dimensional shape using our basic skills. All in all our confidence is building as we move on the bag making...
Lessons learnt:
Use an iron to press seams, it works, I can see the point of an iron!!
Accuracy, accuracy, must practice.
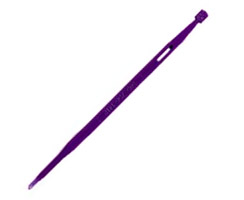
Marking tools. We used a vanishing marker to make the spots to align our squares, the chalk I had borrowed for last weeks cushion would not have worked as well.

Labels:

Sunday, October 11, 2009

Sewing for Boys: part 2

This weeks task was to make a cushion cover. First off we had to practice two seams. The first one was a straight forward seam with the rights sides together then sewn with a straight stitch, but using the marking on the sewing machine plate to get a guide width of 5/8 of an inch. Fine and dandy and not too many problems. The French Seam which was to be for more delicate fabrics where the seam is hidden, was more of a problem, but I got there in the end.

Jamie gets to road test Daddies cushion.

Then it was on to the cushion. I had chosen quite a bold fabric as I was going to make a cushion for the sofa in my son's room. He is still in his cot so we have enough room for a sofa in his room. I chose the turtle fabric as it is a nice strong theme and the blue would liven up the sofa.

The cushion was made up of three panels, one 16 inch square and two 16 x 12 inch panels for the backing. I tried marking out the fabric as correctly as I could and then cut it with scissors. Now I had not appreciated how hard this was going to be to follow a straight line with scissors. I can see the advantage of a rotary cutter to get nice straight lines. After putting a tidy seam on each of the back panels, the three pieces were pinned together. I can't say that I found this supposedly simple task too easy either and I think there must be some tips that I can glean from the shop.

Anyway we were away and stitching round all sides of the square to make my cushion. I was pretty pleased as I came to the end and then turned it inside out to reveal... Yep I hadn't put all the front sides together and now the front of my cushion was the wrong side. I wasn't the only one to make this basic but really annoying mistake. We had run out of time at the class so I would have to unpick at home and do it again.

At home I was using an old Bernina sewing machine of my mums. It had lots more buttons to press, an LCD screen but after a bit of work I had the bobbin loaded, straight stitch selected and was ready to go. Things did not go well, I could not follow a straight line and the stitching was going off all the time. I had to unpick three or four times, until I marked the straight lines on the fabric and then I could follow that. I think I might not have been going fast enough and wasn't letting the machine do the work. Eventually though it was done, I turned it inside out, pushed out the corners and loaded a cushion inside. Despite all the errors I am pleased with the result.


The finished cushion in place.

Lessons learnt:

Pinning is harder than it looks to make sure the fabrics don't pucker up.

Sewing in a straight line and following a guide isn't that easy and needs practice.

Double and then triple check that you are sewing your fabric pieces the right way round!!

Cutting a straight line with scissors takes practice and a rotary cutter goes faster.

Next week is a door-stop!!

Labels:

Saturday, October 3, 2009

Sewing for Boys: part 1

Well I have survived my first lesson. I have done a couple of night school classes before, and I used to run one on web design at the University in Reading so the administration and setup of the course was not a problem. The stepping into the complete unknown of the sewing world was making me a bit nervous though. There weren't a lot of details on what it would entail and my wife had packed me off with a small bag containing some bits of fabric, a couple of reels of cotton and some hand sewing needles!!

There are about eight of us in the class, all with slightly varying expectations but it seemed that I wasn't out of my depth and didn't need the class on sewing for 'real complete absolute novices who haven't a clue'. Our teacher leapt straight in and showed us the sewing machines we would be using, basic but good quality Bernina Bernette machines, showed us how to put thread on the bobbin, how to load the bobbin, how to thread the needle and then said off you go!!

We had a machine each and after a few false starts and conferrings between us after twenty minutes bobbins were loaded and we were ready to sew. Now I am sure this seems very basic stuff for many of you. But I have to admit that a sewing machine is quite a daunting beast and I have never known how they work. Then with a scrap piece of fabric we were off and trying to sew. First off was a straight stitch, then lifting the foot and turning corners, fancy stitches and varying stitch width and length. You can see my first trial piece below. I have to admit it was really good fun.

My first practice piece.

Getting used to the foot control and trying to vary the speed took some getting used to. I hadn't realised how fast you could go. Also a complete surprise to me was that they have in effect a reverse gear. I certainly wasn't in control but I was making progress.
We had a short break and then we were told what we would be making. A tissue holder. Now from the practical side of things this is not something that I will be using everyday, but from the sewing side it looked very daunting. It was lined, there were seams, points to push out, you had to sew it inside out.... You can see my effort below. My first finished piece

It isn't that straight and the stitching doesn't go all the way across at the front but I was really pleased for a first attempt. I think everyone was really surprised that after only two hours we had gone from complete novices to being able to produce a finished piece.
The whole experience was really good fun and enjoyable. Supposedly next week we are going to make a cushion cover. Which seems to be a huge and very rapid leap. We need a half a metre of fabric so I will see what I can find in the shop and I need to dig out my mum's old sewing machine, get some thread...

Labels:

Thursday, October 1, 2009

Dangerous Sewing For Boys

Welcome to an occasional series following my exploits as I enter the dangerous and exciting world of Sewing for Boys. First of all introductions. My name is David and I run the web side of things here at The Cotton Patch. That means that all the products and fabrics that are on the web site, and there are many thousands of them, pass over my desk. Now whilst some of them might be self explanatory others are just plain strange. What does one do with a Purple Thang?!!!


Because I also get to see all the patchwork and quilting books that we sell, I can only marvel at the fantastic designs and creations that are on display. I also get an opportunity to see them up close as we attend two quilt shows a year, at Malvern and the Festival of Quilts at the NEC. We set up our stands for these shows the day before they open to the public and whilst unloading the vans of stock, I try and take the opportunity to look at the quilts on display. At the Festival of Quilts this year the detailed quilting work of Sandie Lush and the art quilts of Ferret stood out for me. We are also fortunate that on our stand we had examples of the quilts from Kaffe Fassett's new book Quilt Romance on display. Kaffe's fabrics are always bright and bold and the combination of intricate designs and vivid colouration works really well.

Is that a Bosch or a Black and Decker?


On a personal note one of the main styles of artwork that I like is Japanese. So the intricate work of Kumiko Sudo, Sashiko, the many Japanese bag books and magazines such as Quilts Japan are firm favourites.

Kake-Jiku by Kumiko Sudo

But why am I telling you all this? Well I have decided to take the plunge and enter the dangerous world of sewing!!

Now I am a complete novice, I have tried to sew the odd rip in clothes whilst travelling but that is it. But boys just don't sew do they? I did woodwork at school. A sewing machine is a complete mystery, what types of thread, to use, which hand to use!!
So I have enrolled on a night school class. Sewing Skills for Beginners. Well it sums me up and over the coming weeks I'll post on my progress as hopefully I travel from complete novice to .....

Labels: